
Blog #3: The LEGOYO Takes Shape
- Team
- Oct 2, 2019
- 3 min read
Updated: Oct 9, 2019
In lab last week we discussed our top ideas of a disco ball, LEGO, avengers, Mike Wazowski, and apple brand. We had additional team meeting after lab to discuss each idea. First, we decided that disco ball would require an absurd number of tiny pieces of aluminum (or reflective acrylic) and that we would regret chosing this deseign by the end of the semester. We appreciated our lab instructor's advice on this topic. One person was excited about Mike Wazowski, but the team decided it would be too easy for this friendly monster to come out looking creepy. We all liked the idea of an Apple branded yo-yo, but we were unsure if we would be able to recreate the sleek brushed aluminum finish of the laptops we admire. We did not want a generic silver yo-yo with an apple on it. This left us to chose between the Avengers logo, and a LEGO. Although we did not all grow up adoring superheros, we can all trace the beginning of our engineering careers to a time when we played with LEGOs. With the knowledge we had at the time both concepts seemed equally executable, but we realized our team had much more enthusiasm for the LEGO plan.
Once we made a decision we still had a lot of details to sort out. We discussed a lot of variations for what could adorn the front and back of our yoyo, such as raised nubs, lego bricks that could stick to our yo-yo, or indents from the underside of legos. Legos are a classic example of successful injection molding, so we had spend a more time thinking about how to incorporate a thermoformed component. In the end, we decided to put a hole in the (injection molded) back that would reveal a raised LEGO logo. This will be the thermoformed component.

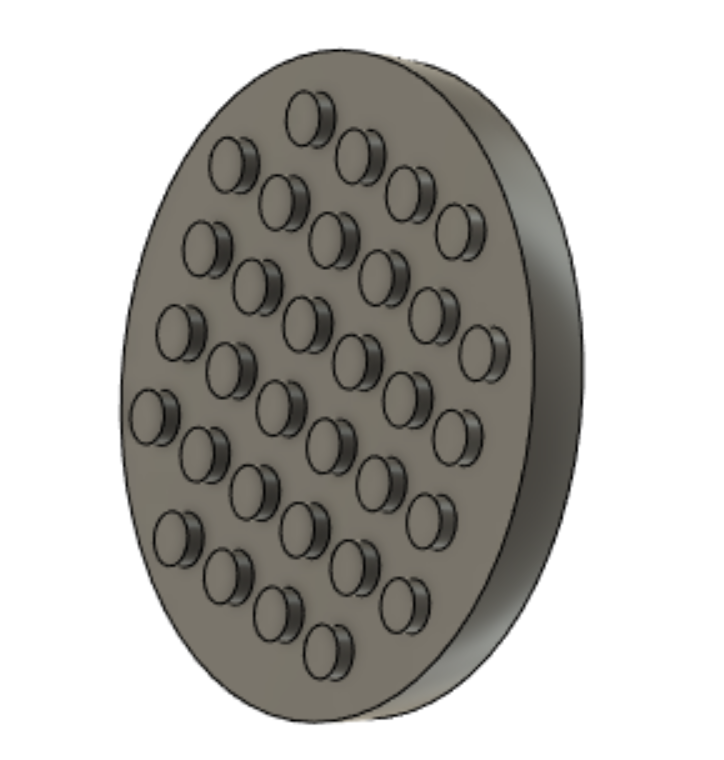
After we have all the pieces, the assembly process for the front of the yoyo (which mimics the top of a lego brick) will consist of press-fiting the outer face over the housing of the yo-yo. This front surface will feature 32 raised nubs that can interface with any standard, name brand LEGO bricks. The other half of the yo-yo will be a little more complicated, but still should be assembled in a single step. The thermoformed LEGO logo will be placed underneath the back cover, revealing the logo through the hole in the injection molded cover. This logo will be held in place by the back cover press fitting over the housing. The two haves will be screwed together with the threaded rod and spacer.

We anticipate accurately sizing the molds to form a strong press-fit will be the most challenging part of this design. The housing and cover are slightly different sizes, and so they may shrink at different rates. We are also concerned about the accuracy of our LEGO nubs. We will be embarrassed if name brand LEGO bricks do not fit onto our knock-off lego yo-yo. Our vision is to stack (and firmly attach to each other) all fifty yo-yos to form one awe-inspiring tower that strecthes more than eighty inches into the sky. This will require precise patterns on the front and back of the yo-yos, as well as a strong base. We may need to by a few name brand LEGOs to form a wide base for the structure.

If we do not fulfill this vision, it will likely be because the nubs (on the front) and recesses (on the back) do not have sharp enough corners. This high standard will make machining these two molds very difficult. If we fillet the top of the front nubs, they may still fit into back recesses that do not have perfect corners. Also, these recesses are small, so it is likely we have an end mill that can create the clean cylinder recess we desire.


Comments